You glance at your tiny bathroom and think, “Where do I put anything?” I know the feeling.
I once balanced shampoo on a window ledge and used the toilet tank as a shelf. It worked—until it didn’t. The good news? You don’t need more space.
You need smarter storage. I’ll show you how to maximize storage in a small bathroom with ideas that look good, hold a lot, and simplify your mornings.
I enjoy creating storage from thin air. I measure, map zones, and give each item a “home.” I also pick organizers that thrive in moisture and tight spots.
Ever wonder why some small bathrooms feel calm while others seem chaotic? Smart storage is the answer. Let’s create that calm together.
Start with a plan that respects your space
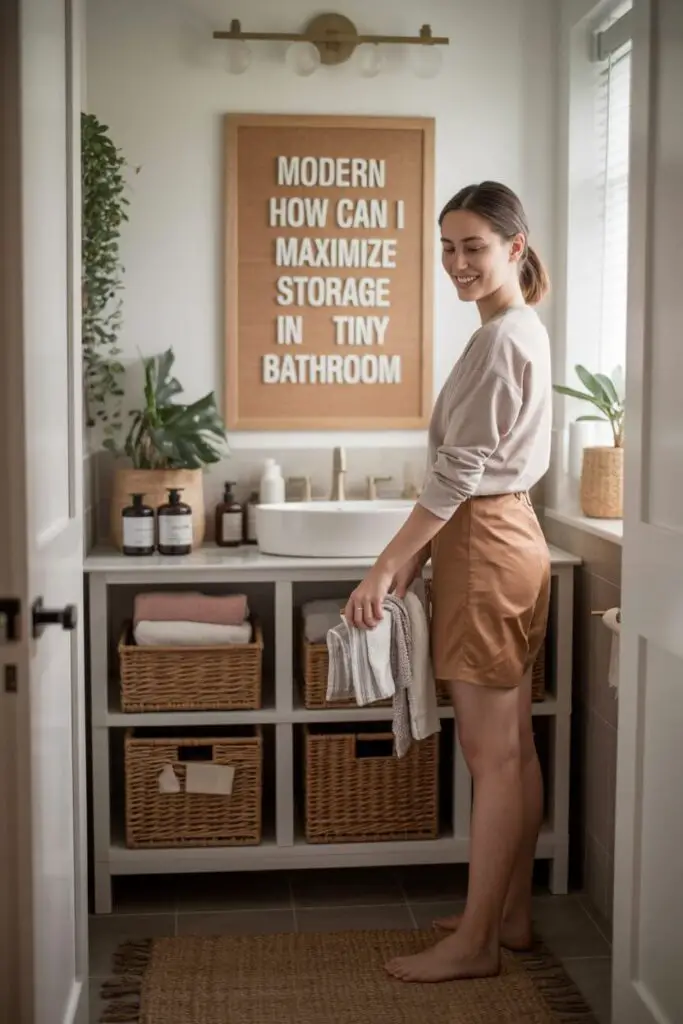
You can’t organize air. You need a simple plan before you buy a single basket.
Map the space and your stuff
- Measure everything: Measure the room length and width, vanity width and depth, toilet clearance, and door swing. Measure vertical space up to the ceiling. Numbers beat guessing.
- List categories: Sort items into daily use, weekly use, and backup stock. Store daily items at arm’s reach. Push backups high or out of sight.
- Create zones: Assign shower, grooming, cleaning, meds/first aid, and linens to specific spots. Zones stop random drift.
I once skipped the zone step and kept cotton pads in three places. I felt busy, not organized. Zones fixed it overnight.
Go vertical like you mean it
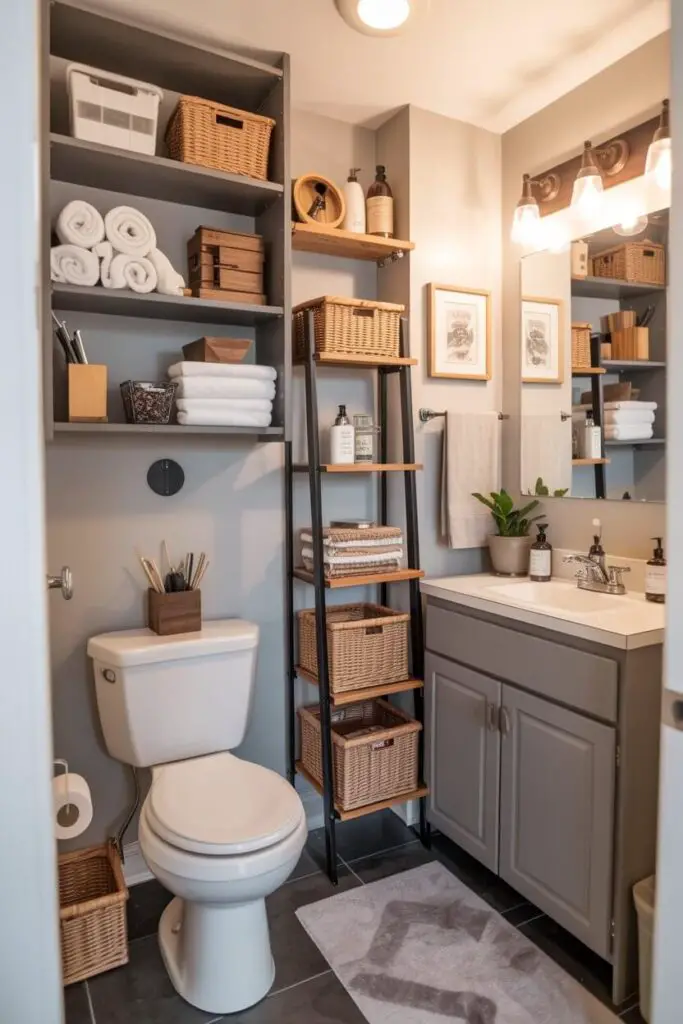
Your walls carry hidden square footage. Use them.
Over-the-toilet, over-the-door, and high shelves
- Over-the-toilet shelves or cabinets: Why it works: You claim dead space without shrinking the floor. What to store: Towels, tissue, and backup toiletries in lidded bins.
- Over-the-door shelf: Why it works: The zone above the door sits empty in most homes. What to store: Rarely used items like guest towels or spare soap.
- Ceiling-high stacking: Why it works: Tall units add serious capacity. Pro tip: Keep the top shelf for backups; keep daily items within easy reach.
Slim towers and ladder shelves
- Slim linen tower: Use case: Narrow gaps between vanity and wall. Store: Folded towels, hair tools in heat-safe containers.
- Ladder shelf: Use case: Small footprint with layered surfaces. Style tip: Mix baskets and open stacks to balance pretty and practical.
Make your vanity work harder (drawers win)
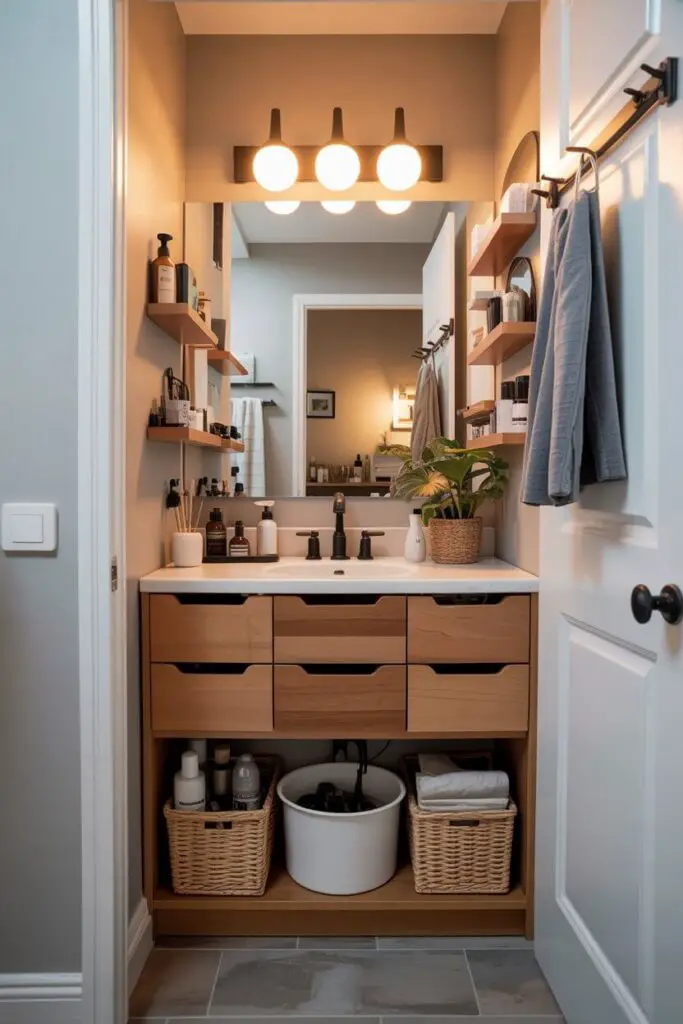
Vanities can hide chaos or organize your life. I vote for the second option.
Choose drawers over doors
- Why drawers: Reason: Drawers deliver full access to the back without contortions. Pick: U-shaped drawers that wrap around plumbing.
- Add organizers that fit the drawer: Use: Shallow trays for small items, deep bins for tall bottles. Rule: Assign one category per compartment.
Under-sink game plan
- Use risers and shelf inserts: Why: You double the vertical space under the sink. Place: Short bins on top, taller items below.
- Lazy Susan turntable: Why: You spin to access every bottle. Best for: Skincare, hair products, and cleaning supplies.
- Tension rod for sprays: Why: You hang spray bottles and free the base shelf. Add: A small bin below for sponges and cloths.
Inside-door storage
- Shallow racks or pocket organizers: Why: Door real estate stores small, flat items. Store: Hairbrushes, cotton pads, and backup razors.
- Magnetic strip: Why: You corral nail clippers, tweezers, and bobby pins. Note: Mount it high to avoid small hands.
Use mirrors and medicine cabinets with storage
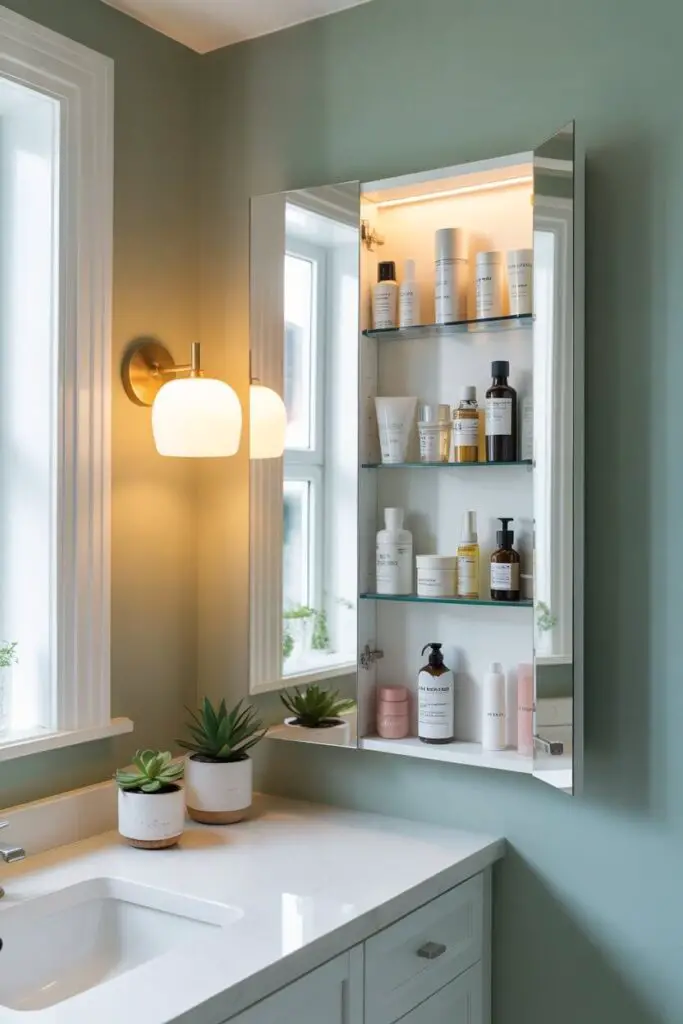
Your mirror can store half your routine if you choose right.
Recessed medicine cabinets
- Why recessed: Reason: You tuck storage between studs and keep the profile slim. Store: Daily meds, skincare, and eye-level essentials.
- Adjustable shelves: Why: You set heights to match bottles, not the other way around. Tip: Keep labels facing forward for quick grabs.
Shallow mirrored cabinets
- Surface-mount option: Why: You get storage without demo. Use: Renters and quick upgrades.
- Triple-door mirrors: Why: You stretch storage across the wall. Note: Align the cabinet with vanity width for clean lines.
Build storage into the shower without the clutter
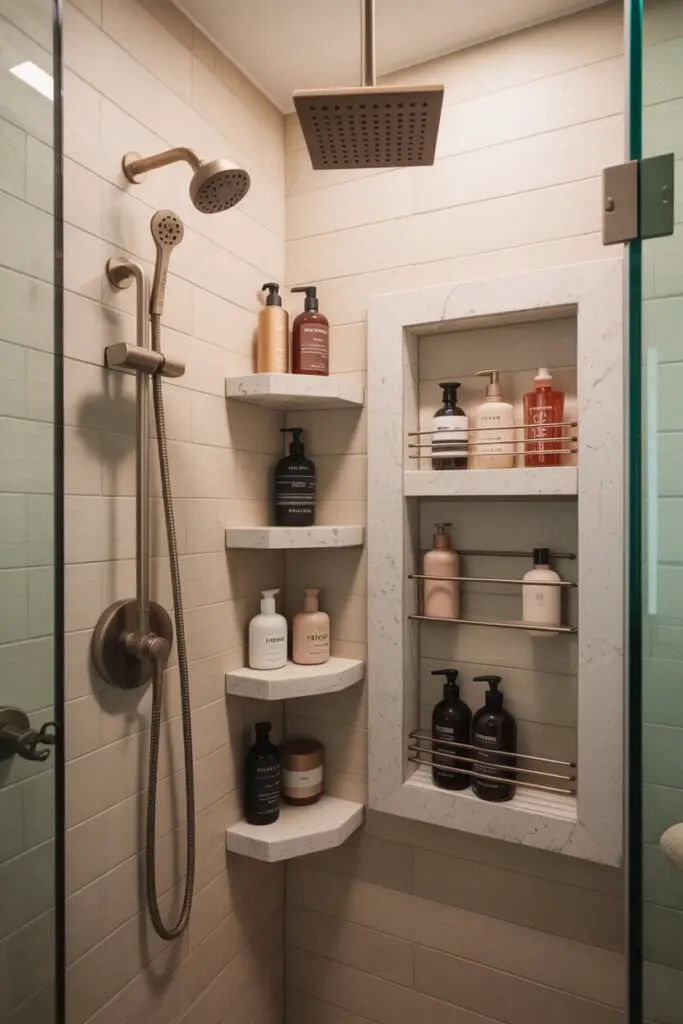
You spend real time in the shower. Protect that zen with storage that actually holds up.
Niches and corner shelves
- Built-in niches: Why: Niches keep bottles off the floor. How many: Add two: one adult height, one lower for shaving or kids.
- Corner shelves: Why: You gain levels without crowding. Material: Stone or porcelain for durability.
Caddies that don’t wobble
- Tension-pole caddies: Why: They install fast and hold multiple tiers. Tip: Choose rust-resistant metal.
- Over-door or over-glass caddies: Why: You use the door for storage, not just for closing. Secure: Add clear pads to stop rattles.
I swapped my flimsy shower rack for a niche and one corner shelf. I cut visual noise and still kept every bottle I use. Win-win.
Claim corners, alcoves, and between-stud cavities
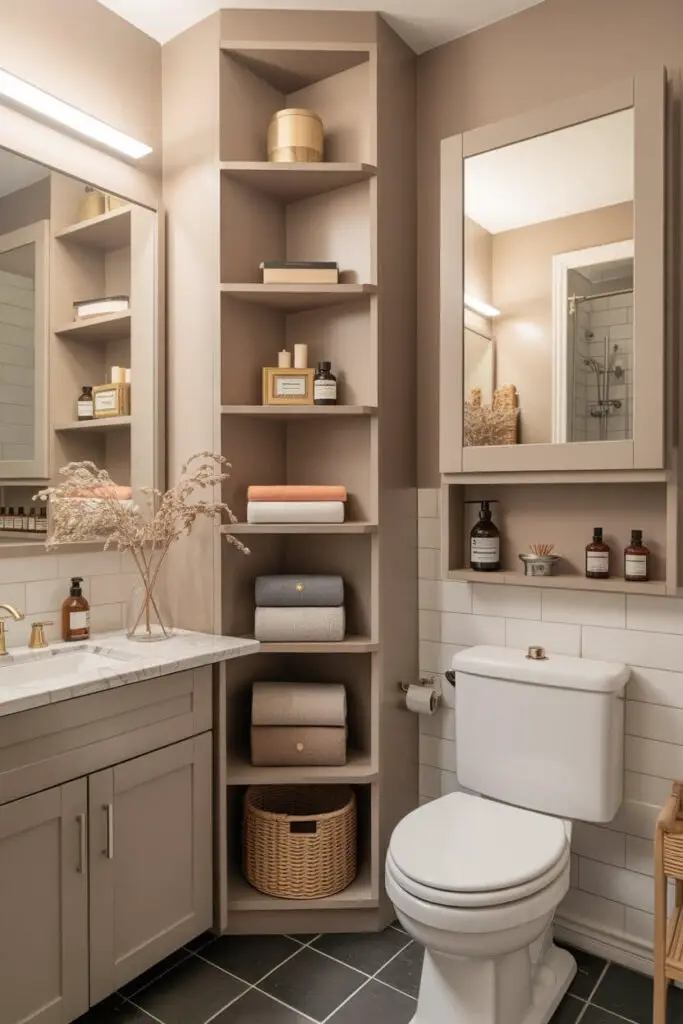
You can add storage without eating floor space.
Corner solutions
- Triangular floating shelves: Why: Corners love triangles. Store: Candles, extra tissue, and rolled washcloths.
- Corner cabinet: Why: You get a door to hide less-pretty items. Style: Keep finishes consistent with your vanity.
Between-stud built-ins
- Recessed shelves: Why: You add depth where walls allow. Use: Narrow items like perfumes, jars, and rolled towels.
- Recessed cabinet with door: Why: You hide clutter and store more. Note: Check plumbing and electrical before you cut.
Work the walls: hooks, rails, and bars
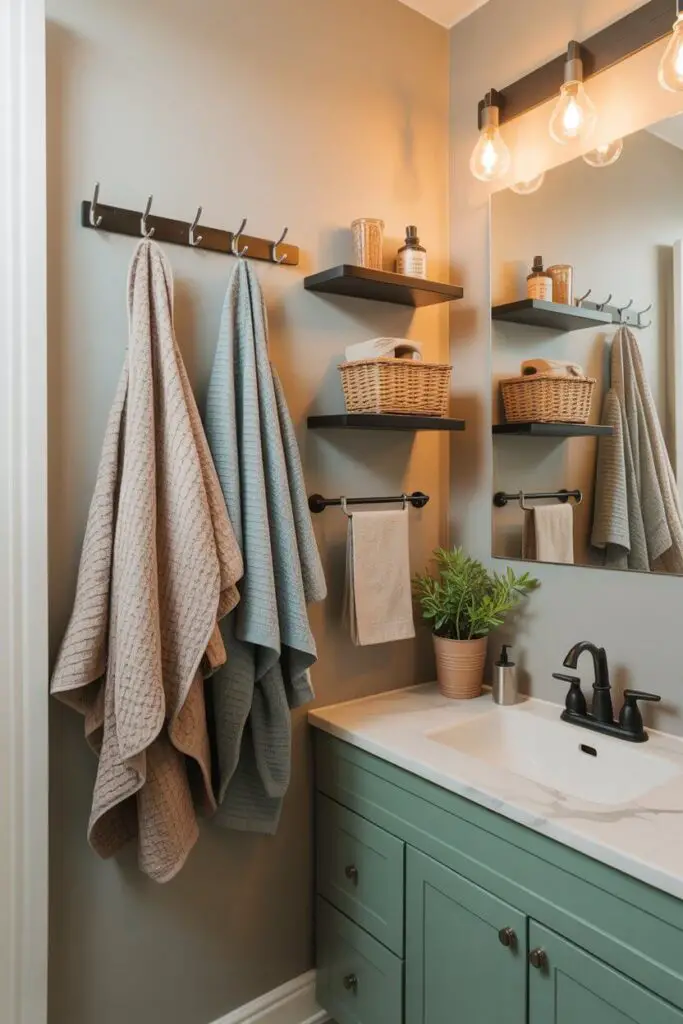
You don’t need huge surfaces. You need the right hardware in the right places.
Hooks beat bars in small spaces
- Hooks for towels: Why: Hooks dry towels and take less wall space. Placement: One per person, spaced comfortably.
- Back-of-door hooks: Why: The door gives you bonus hanging space. Use: Robes, hair towels, and guest sets.
Rails and magnetic strips
- Slim rails: Why: You hang hand towels, washcloths, or small baskets. Tip: Keep rails near the sink for easy reach.
- Magnetic strip (wall-mounted): Why: You hold grooming tools and nail bits. Protect: Add small metal cups for safety.
Baskets, bins, and labels (the calm-makers)
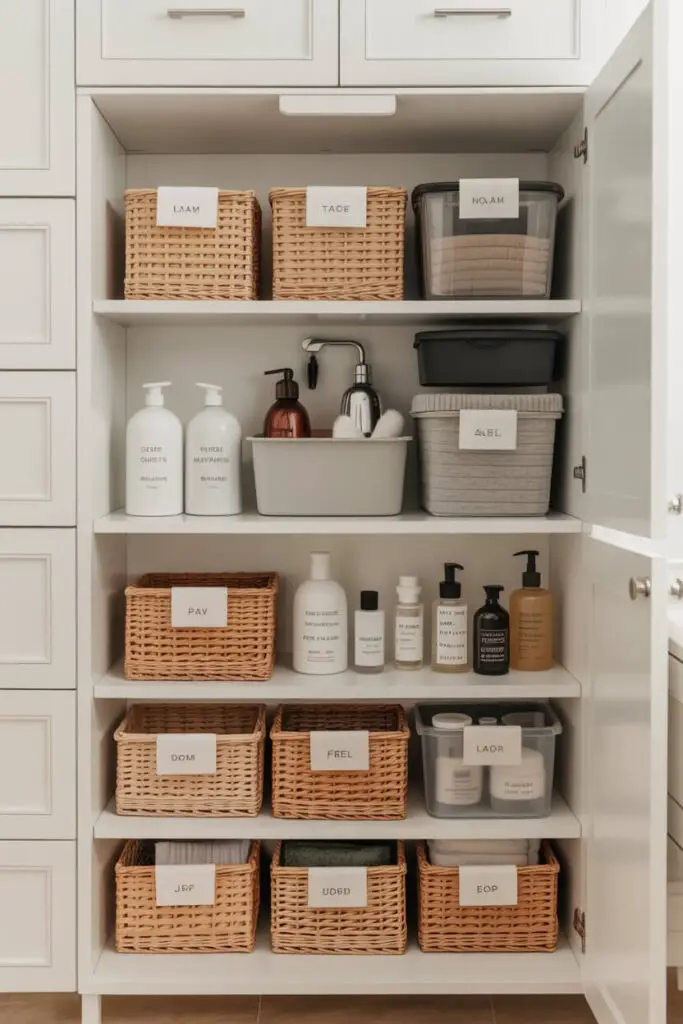
Containment creates calm. Open storage looks tidy when you group, label, and repeat.
Choosing the right containers
- Match materials to moisture: Pick: Plastic, resin, metal, or coated baskets. Avoid: Raw fabric bins that hold damp.
- Use lidded bins up high: Store: Backups and extras away from steam. Label: Keep a label on the narrow side for easy ID.
- Clear bins under the sink: Why: You see what’s low at a glance. Add: Drawer-style bins for deep cabinets.
Labeling without the craft project
- Simple labels: Use: Printed or clip-on tags. Categories: Haircare, skincare, oral care, first aid, cleaning.
- One-in, one-out rule: Why: You keep volume steady and avoid overflow. Apply: Replace as you finish, not when the sales hit.
Renter-friendly tiny bathroom storage hacks
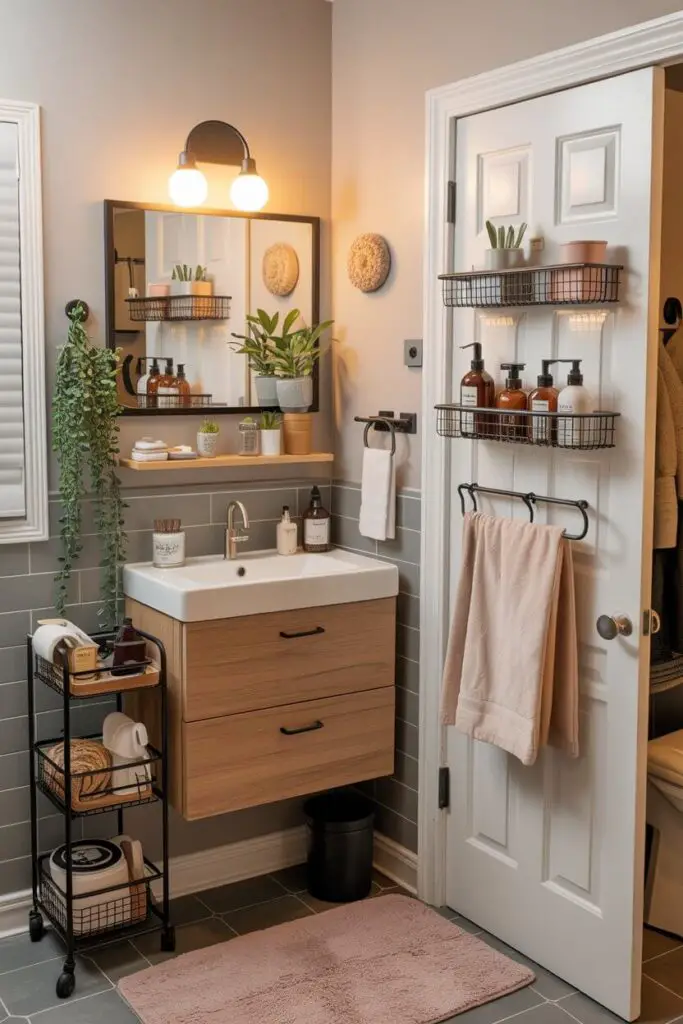
You can upgrade storage without drilling a million holes.
Tension, adhesive, and freestanding fixes
- Tension rods and poles: Use: Showers, under-sink, and between walls. Hang: Baskets, sprays, and cloths.
- Adhesive hooks and shelves: Pick: High-quality adhesive rated for humidity. Mount: Inside cabinet doors and shower walls.
- Freestanding carts: Use case: Slide a slim rolling cart beside the vanity. Store: Daily items in top tiers; backups below.
Over-the-door upgrades
- Over-door racks: Why: You add shelves and hooks without tools. Arrange: Towels up top, quick-grab items at eye level.
- Pocket organizers: Why: You sort small items in clear sleeves. Location: Back of the door or inside a tall cabinet.
Smart fixture choices that add storage
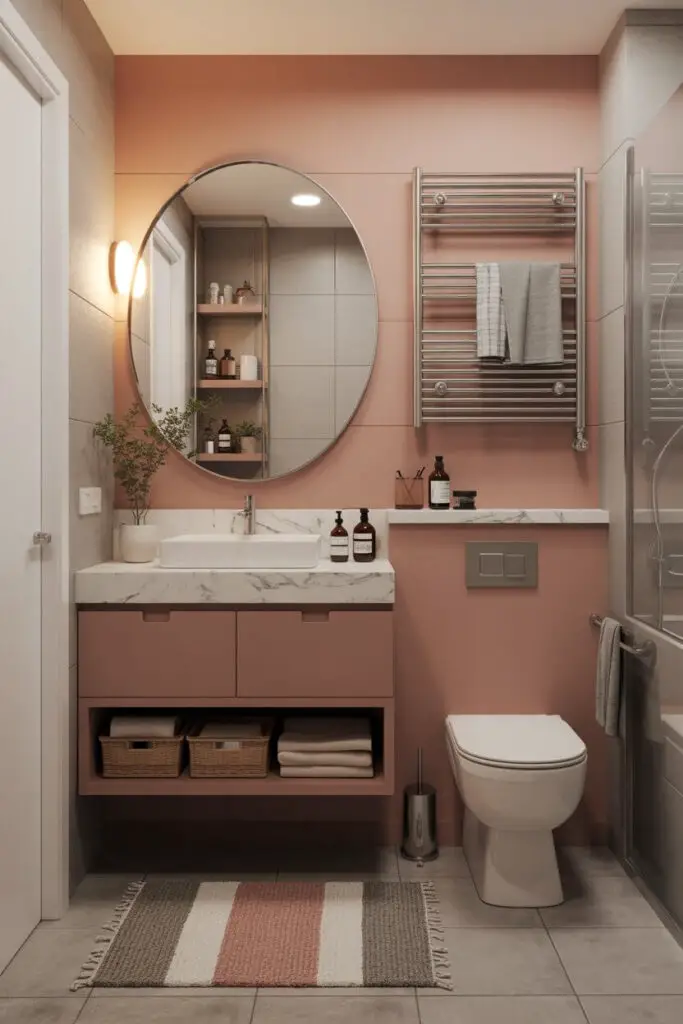
You can multiply storage when you upgrade the right pieces.
Floating vanity with drawers
- Why it helps: Reason: Drawers hold more, and the floor space looks bigger. Bonus: Slide a small hamper or scale underneath.
Toilet with a slim tank shelf
- Why it helps: Reason: A narrow ledge holds tissues and a small tray. Style: Keep it minimal to avoid clutter.
Radiator or towel warmer with shelves
- Why it helps: Reason: You combine heating with hanging space. Placement: Near the shower for easy grabs.
Minimalism that still stores everything
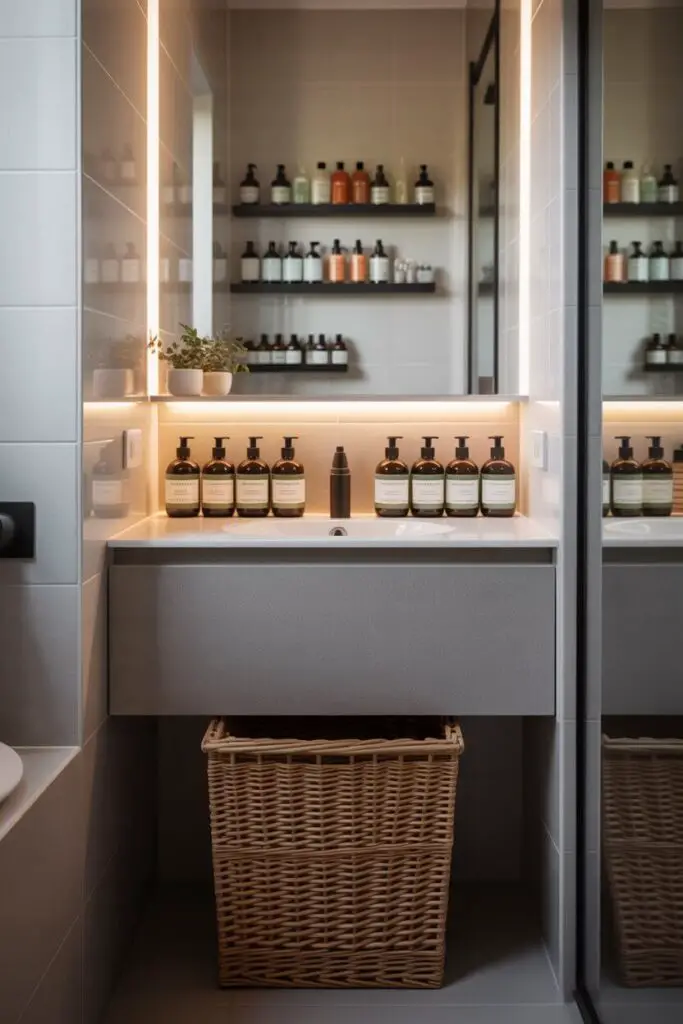
You don’t need “less stuff” shaming. You need clean systems that match real life.
Decant, rotate, and set par levels
- Decant by category: Why: Uniform bottles look calm and fit better. Tip: Label bottom or back discreetly.
- Rotate seasonally: Why: You store heavy lotions in cool months and lighten up when it’s hot. Store: Off-season products high and out of the steam zone.
- Set par levels: Why: Decide the maximum you keep on hand. Example: Two shampoos open max, backups in one bin only.
Laundry and trash that behave
- Slim hamper with lid: Why: You hide laundry and block humidity. Place: Under a floating vanity or behind the door.
- Covered trash can: Why: You contain odors and visual noise. Size: Small, so you empty it often.
Small-space layout tweaks that unlock storage
You can change little things and gain big function.
Door, glass, and curtain choices
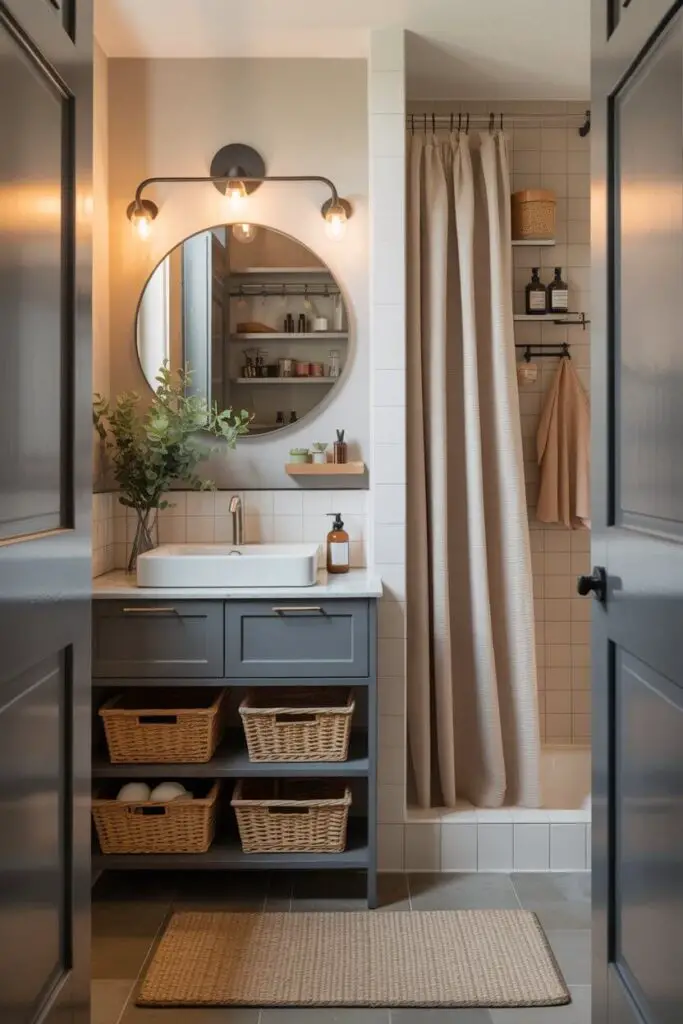
- Pocket or barn door (if possible): Why: You free back-of-door hook space inside. Result: More hanging without door collisions.
- Glass panel vs. full door: Why: A fixed panel gives you a wall face for a shallow shelf or hook. Use: Hooks for squeegee and loofahs.
- Shower curtain trick: Why: A curtain rod with a second inner rod holds bottles in clip-on caddies. Note: Keep it tidy to avoid clutter vibes.
Above-toilet and vanity width
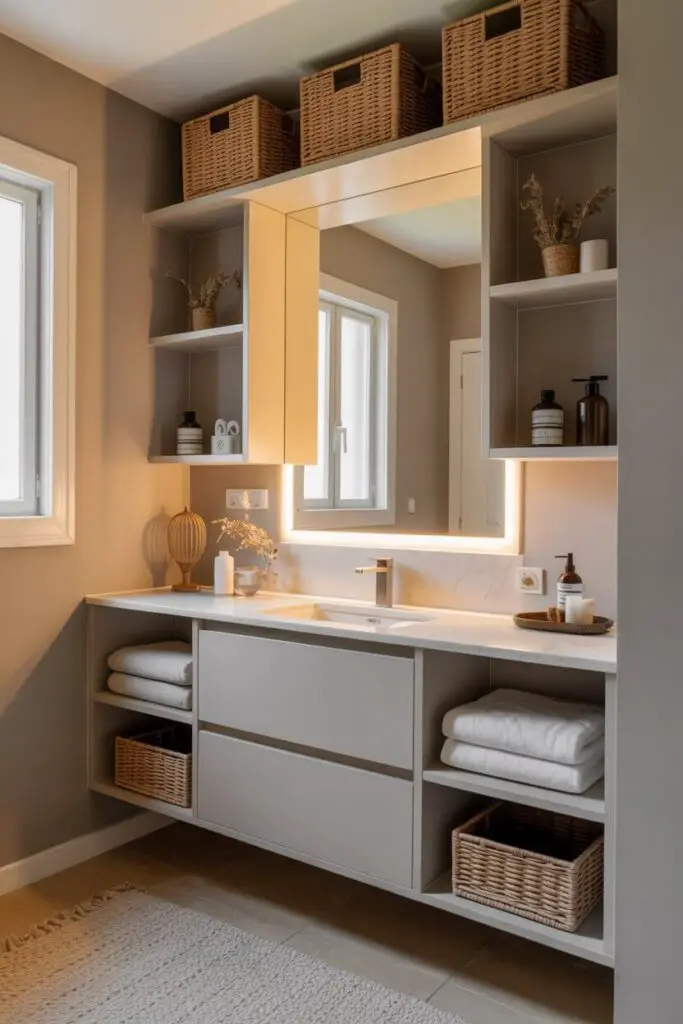
- Extend shelf width to vanity edges: Why: You align edges and gain a polished look. Result: More surface without feeling random.
- Choose a slightly wider vanity: Why: 5–10 cm extra width can double drawer usefulness. Measure: Check door clearance first.
Materials and maintenance that survive humidity
Humidity tests every organizer you choose. Plan for it.
Moisture-smart picks
- Rust-resistant metals: Pick: Stainless, aluminum, or coated steel. Avoid: Bare iron in wet zones.
- Water-resistant woods: Pick: Teak, bamboo, or sealed wood. Maintain: Wipe and oil as needed.
- Wipeable bins: Pick: Acrylic, PET, PP, or enamel-coated options. Clean: Quick wipe weekly keeps them fresh.
Budget, timeline, and what to DIY
You can stretch every coin when you prioritize the right upgrades.
Spend here, save there
- Spend on: Mirrored medicine cabinet, drawer-based vanity, strong adhesive hardware, and quality baskets.
- Save on: Decanting bottles, labels, rolling carts, and clear bins.
DIY checklist
- Install: Over-door racks, adhesive hooks, tension rods, and floating shelves (with wall anchors).
- Hire for: Recessed niches, between-stud cabinets, and plumbing-adjacent cuts.
Mistakes I see all the time (and how to fix them)
Skip these, and your tiny bathroom will thank you.
- Too many small containers: Fix: Use fewer, larger bins with dividers to reduce visual noise.
- Ignoring vertical space: Fix: Add over-toilet storage and an over-door shelf this weekend.
- Random finishes: Fix: Pick one metal finish and repeat it across hooks, rails, and frames.
- Countertop chaos: Fix: Add a tray, keep five daily items max, and store the rest.
- Fabric baskets near the shower: Fix: Swap to plastic or metal; save fabric for low-humidity zones.
- No system for backups: Fix: Limit backups to one labeled bin and set par levels.
A weekend plan to maximize storage in your tiny bathroom
You want momentum. Follow this, and you’ll feel a difference by Sunday night.
Day 1: Edit, measure, and zone
- Empty everything: Action: Pull items out and group by category. Toss expired products.
- Measure the space: Action: Measure walls, vanity interiors, and door clearance.
- Assign zones: Action: Decide where each category lives.
Day 2: Install, contain, and style
- Install vertical storage: Action: Add over-toilet shelves and an over-door shelf.
- Upgrade the vanity interior: Action: Add risers, bins, turntable, and an inside-door organizer.
- Optimize the shower: Action: Install a corner shelf or tension caddy.
- Style surfaces: Action: Add a tray, limit counter items to daily use, and place a small plant if you have light.
- Label and set par levels: Action: Label bins and decide your maximum counts.
FYI: I always end with labels and a quick photo. Photos help you maintain the setup when life gets busy. 🙂
Tiny bathroom storage essentials checklist
Use this as your fast-shopping guide.
- Walls & vertical:
- Over-the-toilet shelf or cabinet
- Over-door shelf
- Hooks or slim towel rails
- Corner shelves
- Vanity & under-sink:
- Drawer dividers
- Shelf risers
- Turntable (Lazy Susan)
- Inside-door organizer
- Tension rod for sprays
- Mirror & med storage:
- Recessed or surface medicine cabinet
- Adjustable shelves
- Shower:
- Recessed niche or tension caddy
- Rust-resistant corner shelf
- Containment:
- Clear bins (lidded and open)
- Labels or clip-on tags
- Covered trash can
- Slim hamper with lid
- Renter-friendly:
- Adhesive hooks
- Over-door racks or pocket organizers
- Slim rolling cart
Quick wins if you only have 30 minutes
- Add three hooks behind the door.
- Place a turntable under the sink for bottles.
- Install an inside-door organizer for flat items.
- Put a tray on the counter and cap daily items at five.
- Label one bin “Backups” and move extras there.
Final take: smart storage beats square footage
You asked, “How can I maximize storage in my tiny bathroom?” You now have a plan that works in real life.
You measured, assigned zones, and used walls like secret square meters. You upgraded the vanity with drawers, risers, and a turntable.
You built storage into the shower. You corralled the small stuff with bins and labels. You kept finishes consistent and humidity in mind. That combo stays tidy without daily effort.
Start with one vertical add and one under-sink upgrade. Take a photo of your clean counter and use it as your north star.
If an item doesn’t fit a zone, you edit or relocate it. Keep the systems simple, keep the labels clear, and keep your backups in one place.
Your tiny bathroom won’t feel tiny anymore—just efficient, calm, and kind to your routine. IMO, that’s the real flex. 🙂