If you’re like me, Halloween is a great time to be creative. This goes for costumes and treat bags, too.
Why settle for plain store-bought bags? You can make something much cooler and more personal right at home.
In this article, I’ll share 11 DIY Halloween treat bag ideas. These will make your treats stand out and have everyone talking.
Trust me, your bags will be the talk of the neighborhood this year. Let’s dive in!
1. Spooky Spider Web Treat Bags 🕸️
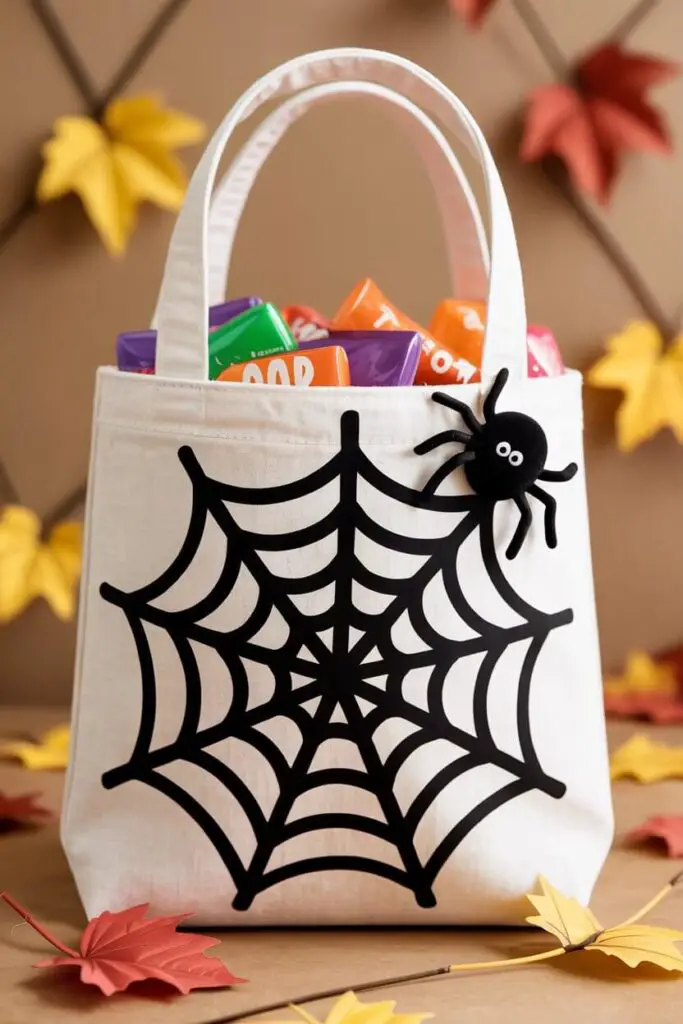
You know what screams Halloween? Spiders! Well, not literally (please, no live spiders), but the spooky spider web design on a treat bag? Yes, please!
These bags are incredibly easy to make, and they look awesome.
Materials:
- White canvas or muslin treat bags
- Black fabric paint
- Small foam spider stickers (optional)
Instructions:
- Lay your bag flat and use the fabric paint to draw a spider web on the front. You can use a stencil or just go freehand for a more rustic look.
- Stick a little foam spider on the web for an added touch.
- Let the paint dry, fill the bag with candy, and you’re good to go!
Why I love it: This is a classic Halloween design that never goes out of style. It’s simple but packs a punch.
Bonus: it’s spider-free, so no one has to worry about a creepy crawl getting in the mix!
2. Pumpkin Patch Pouch 🎃
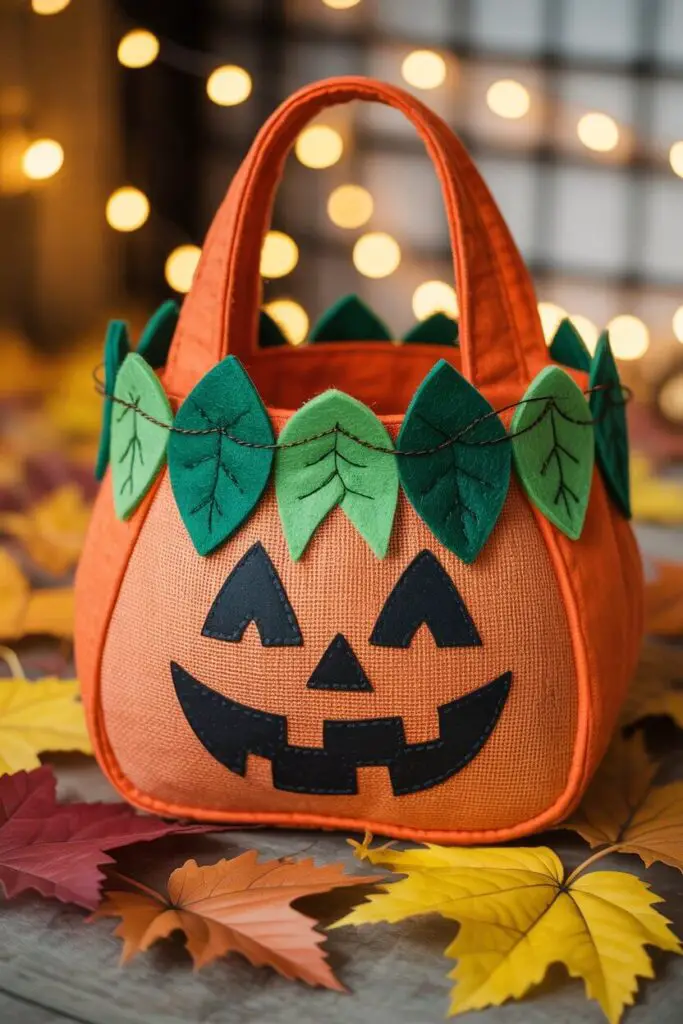
If you can’t get enough pumpkins this season, why not turn them into your treat bag? This pumpkin patch pouch is cute, festive, and so easy to pull off.
Materials:
- Orange fabric bags (or use burlap for a rustic look)
- Green construction paper or felt
- Hot glue gun
- Black marker
Instructions:
- Cut out leaf and vine shapes from the green paper or felt and glue them onto the top of the bag.
- Draw a jack-o’-lantern face with the marker (or skip the face and keep it simple).
- Fill with candy and watch kids’ faces light up!
Why I love it: Pumpkin-themed bags are a crowd-pleaser for all ages.
They’re also incredibly affordable to make, so if you’re planning to hand out treat bags to a lot of little ghouls, this is your go-to.
3. Mummy Wrap Bags 👻
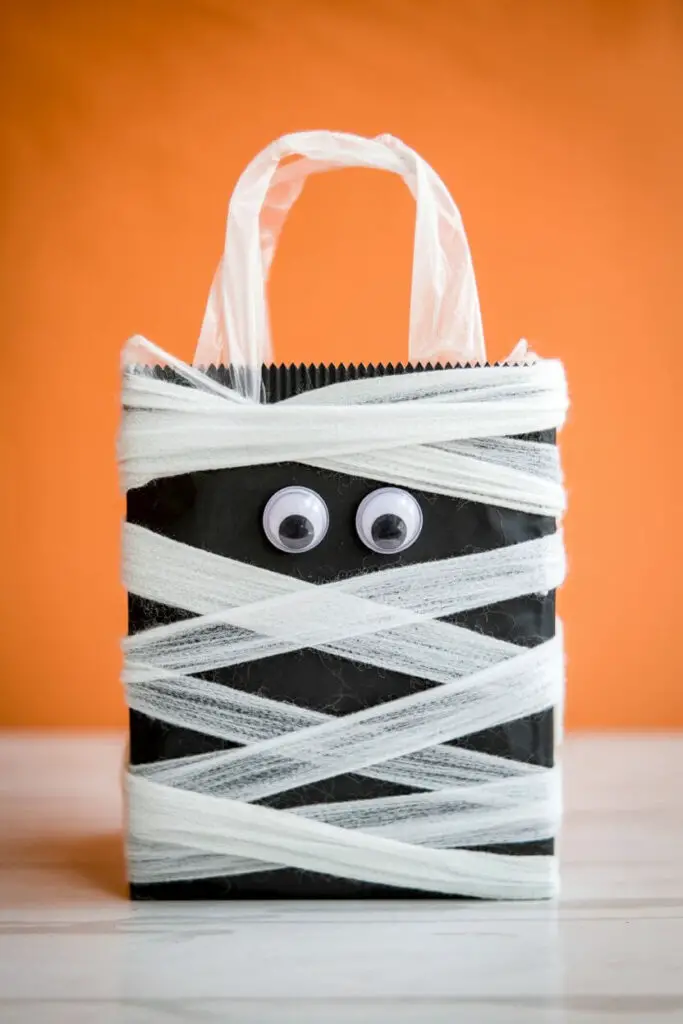
Mummies are classic Halloween characters, and these mummy treat bags will have your guests saying, “How did they do that?” in no time.
Materials:
- White fabric or gauze
- Hot glue gun
- Black marker
- Small googly eyes
Instructions:
- Wrap the white fabric or gauze around the bag, securing it with glue as you go.
- Leave a small opening for the eyes and glue the googly eyes in place.
- Let the glue set, then fill the bag with Halloween goodies.
Why I love it: It’s an easy yet super cute way to give your bags that authentic mummy look. The kids will love the little surprise when they see the googly eyes staring back at them.
4. Witch’s Brew Potion Bags 🧙♀️

Turn your treat bags into magical potion bottles! This one’s perfect for a witch-themed Halloween party.
Materials:
- Purple, black, or green fabric bags
- Glitter glue (in gold or silver)
- Star-shaped stickers
- Black ribbon or twine
Instructions:
- Paint or decorate the bag with glitter glue to create potion bottle designs or magical symbols.
- Stick on some star-shaped stickers for extra flair.
- Tie the bag with black ribbon, and it’s ready to brew up some Halloween magic!
Why I love it: If you’re going for a witchy vibe this Halloween, these potion bags will be an absolute hit. They’re full of fun and a little bit of sparkle to brighten up the evening.
5. Skeleton Hands Treat Bags 💀
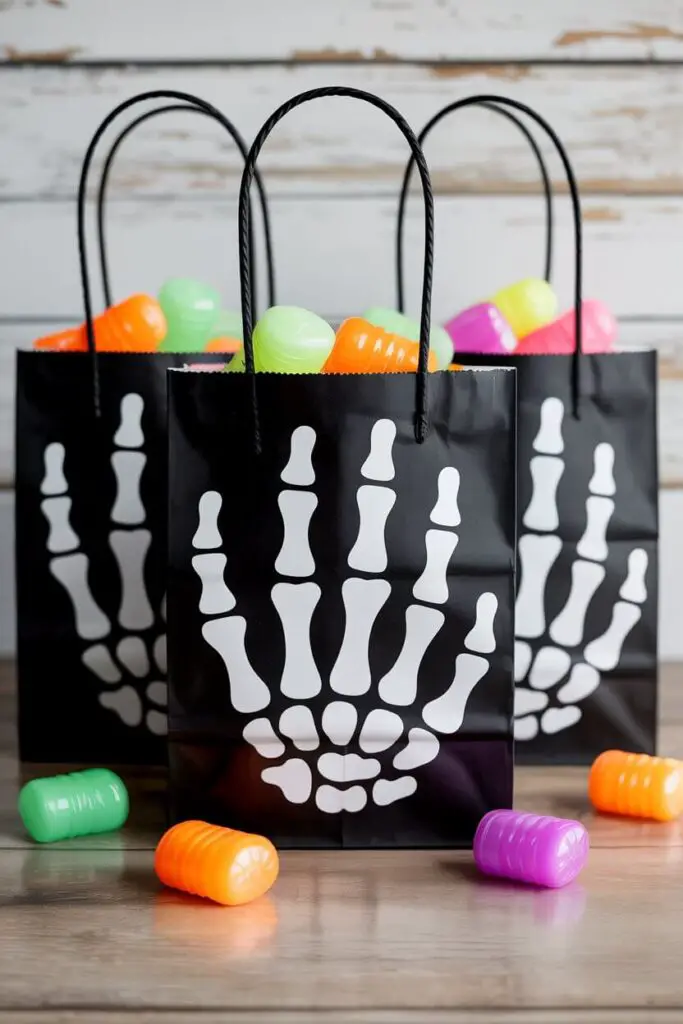
Want to go a little “creepy” without crossing over to full-on horror? Skeleton hands are the perfect spooky-but-still-fun design.
Plus, they’re a fantastic conversation starter!
Materials:
- Black treat bags
- White or glow-in-the-dark paint
- Brush or sponge for painting
Instructions:
- Paint skeletal hand shapes on the front of the treat bags.
- If you want to go extra creepy, use glow-in-the-dark paint for an eerie effect when the lights are off.
- Fill with candy and go on your merry way!
Why I love it: These bags look cool, are super easy to make, and are guaranteed to be a crowd favorite. The best part? No one will be able to resist their glowing hands!
6. Monster Mouth Treat Bags 👹
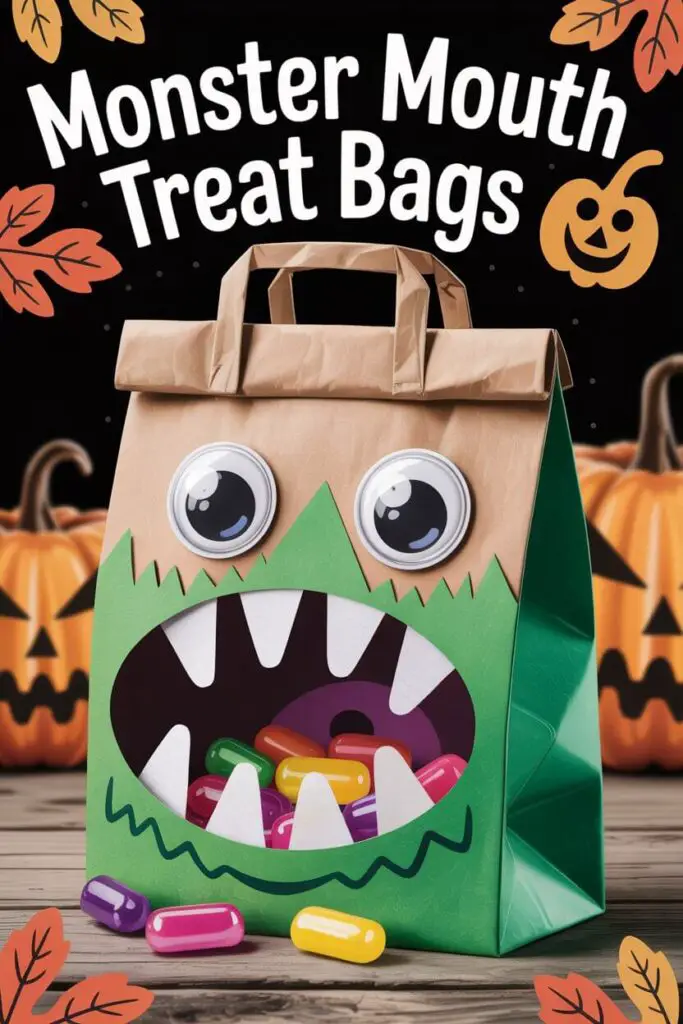
Give the gift of a monster mash with these fun and quirky monster mouth bags.
Perfect for any Halloween party, these bags are guaranteed to bring a grin (or a scream) to anyone who sees them.
Materials:
- Paper lunch bags
- Construction paper (green, blue, or purple)
- Glue stick or hot glue gun
- Scissors
- Googly eyes
Instructions:
- Cut out monster shapes and glue them to the front of the paper bag.
- Cut out teeth and glue them along the opening of the bag.
- Add googly eyes for that extra creepy-cute factor.
- Fill with candy, close the bag, and voilà!
Why I love it: Who doesn’t love a good monster? They’re easy to make, fun to customize, and super cute.
7. Bat Wings Trick-or-Treat Bags 🦇
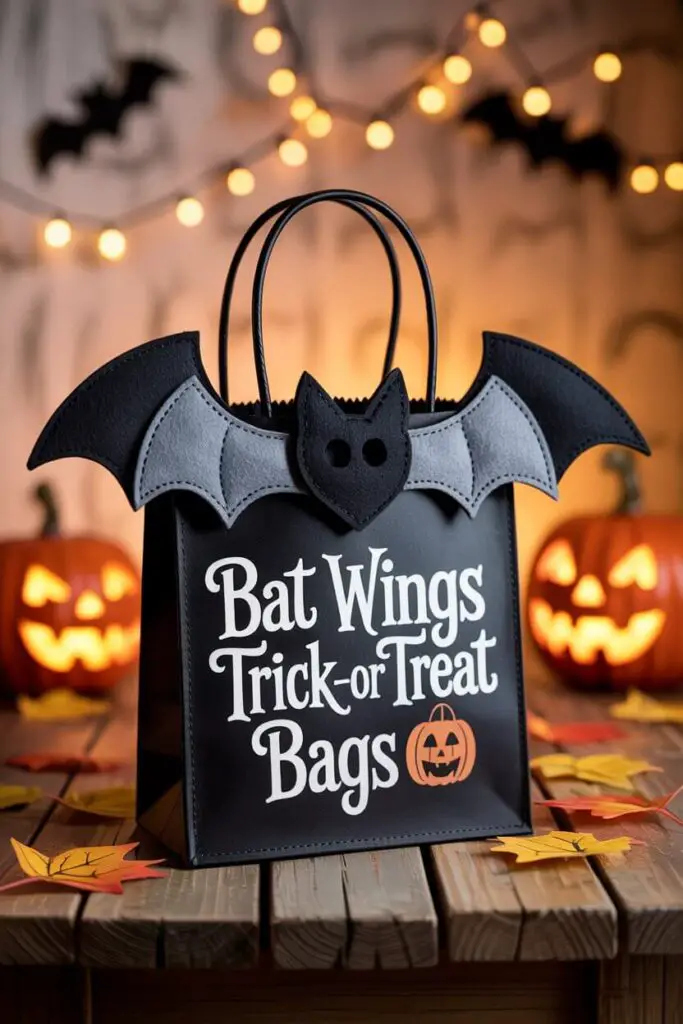
Let’s face it, bats are so Halloween. And if you add them to your treat bags, you’re automatically in the Halloween hall of fame.
Materials:
- Black felt or paper
- Scissors
- Hot glue gun
- Black treat bags
Instructions:
- Cut bat wing shapes out of black felt or paper.
- Attach the wings to the sides of your black treat bags with hot glue.
- Fill with treats and hand them out to your little vampires, witches, and goblins.
Why I love it: The bat wings give the bags a fun, 3D effect that will stand out in a crowd. It’s a simple design with a big spooky punch.
8. Cauldron Treat Bags 🔮
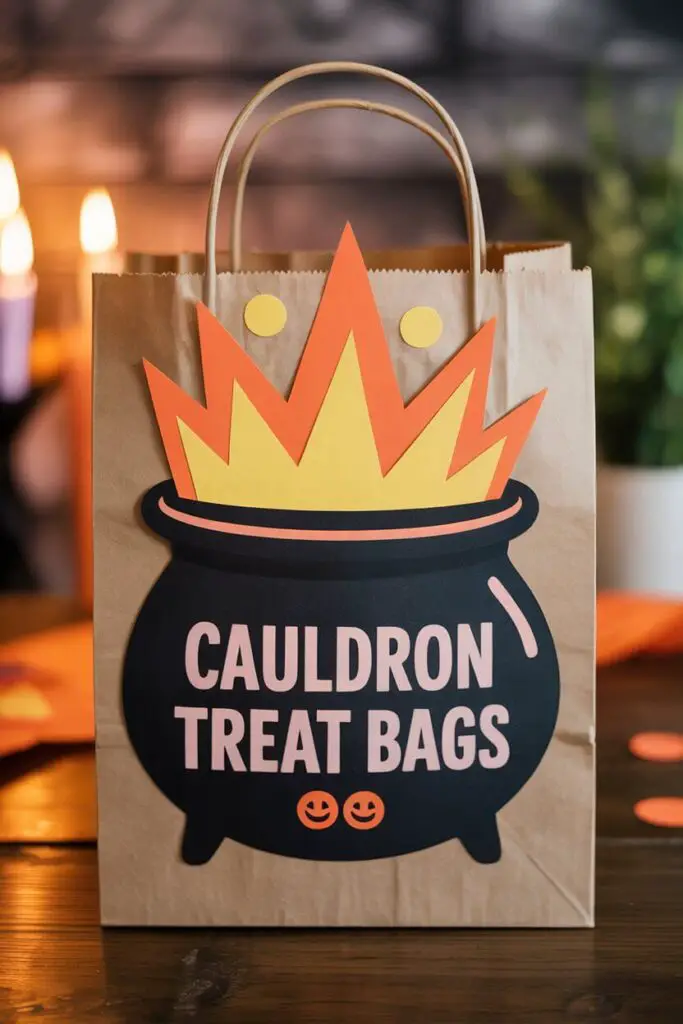
Everyone loves a good cauldron, right? These bags give off major witchy vibes and are perfect for the Halloween season.
Materials:
- Black or green bags
- Yellow and orange construction paper
- Scissors
- Glue stick
Instructions:
- Cut out a cauldron shape from black or green paper and glue it to the front of the bag.
- Cut out orange and yellow flames to make it look like the cauldron is bubbling over.
- Stick it all together and fill with your favorite Halloween treats.
Why I love it: Cauldrons are so iconic, and these bags have a fun, whimsical vibe to them. Plus, they’re easy to make with supplies you probably already have at home!
9. Grim Reaper Bags ⚰️
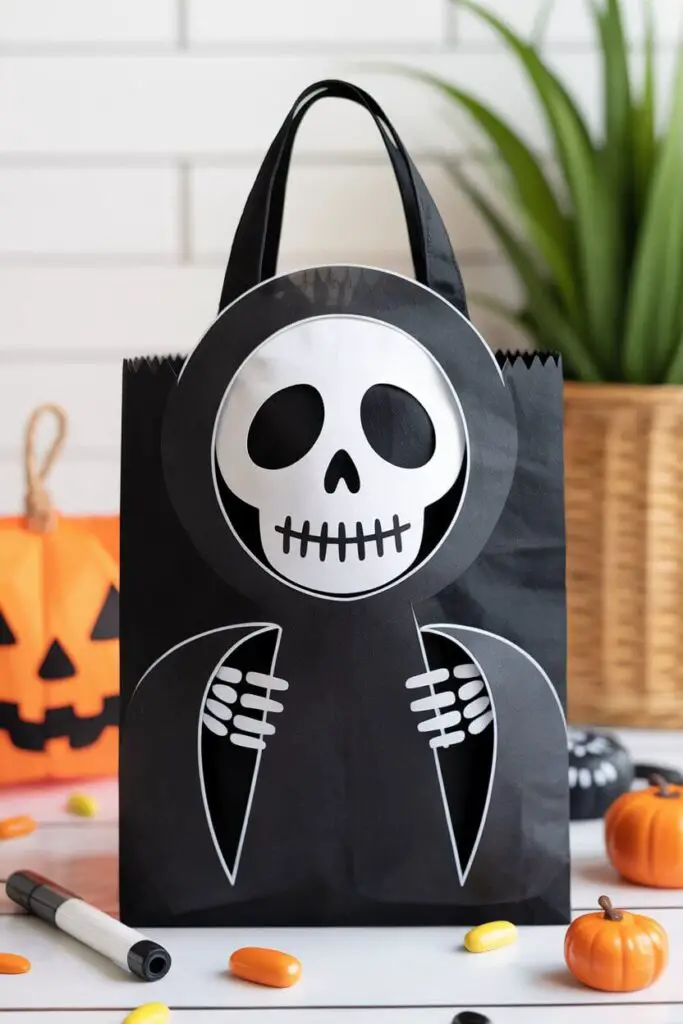
For those who like to keep things extra spooky, the Grim Reaper is the ultimate Halloween symbol. It’s dark, it’s mysterious, and it’s downright cool.
Materials:
- Black fabric bags
- White fabric or felt (for the ghostly cloak)
- Black marker for details
- Hot glue gun
Instructions:
- Cut out a ghostly cloak shape and glue it to the top of the black bag.
- Use the black marker to draw a skeletal face (or skip the face for a more minimalist look).
- Let dry, and fill with candy!
Why I love it: It’s perfect for those looking for a Halloween bag that’s a bit darker. It gives off some serious Deathly vibes while still staying fun for the kids.
10. Frankenstein’s Monster Bags ⚡
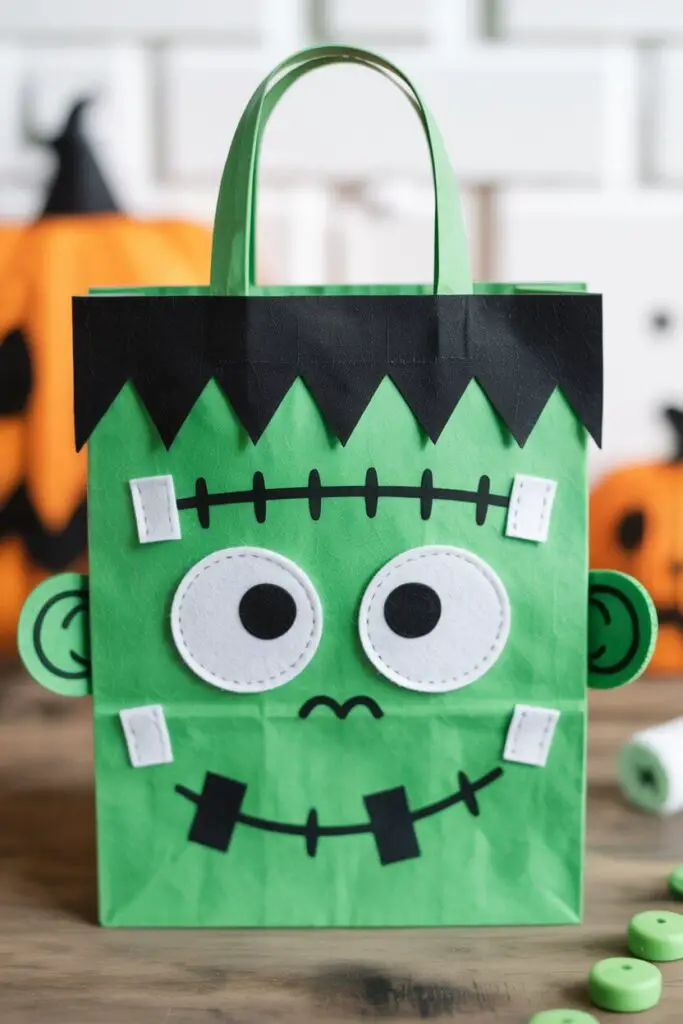
If you love the classic monster flicks, you can’t go wrong with Frankenstein’s monster. These bags are quirky, fun, and sure to make a big impact.
Materials:
- Green fabric or paper bags
- Black felt (for hair)
- White felt (for eyes and stitches)
- Hot glue gun
Instructions:
- Cut out Frankenstein’s hair from the black felt and glue it to the top of your green bag.
- Use white felt to create Frankenstein’s eyes and stitch details.
- Fill with candy, tie off with a ribbon, and it’s ready to go!
Why I love it: Frankenstein is the quintessential monster, and these bags are both fun and easy to make. They’re perfect for a monster-themed Halloween party!
11. Spider Treat Bags 🕷️
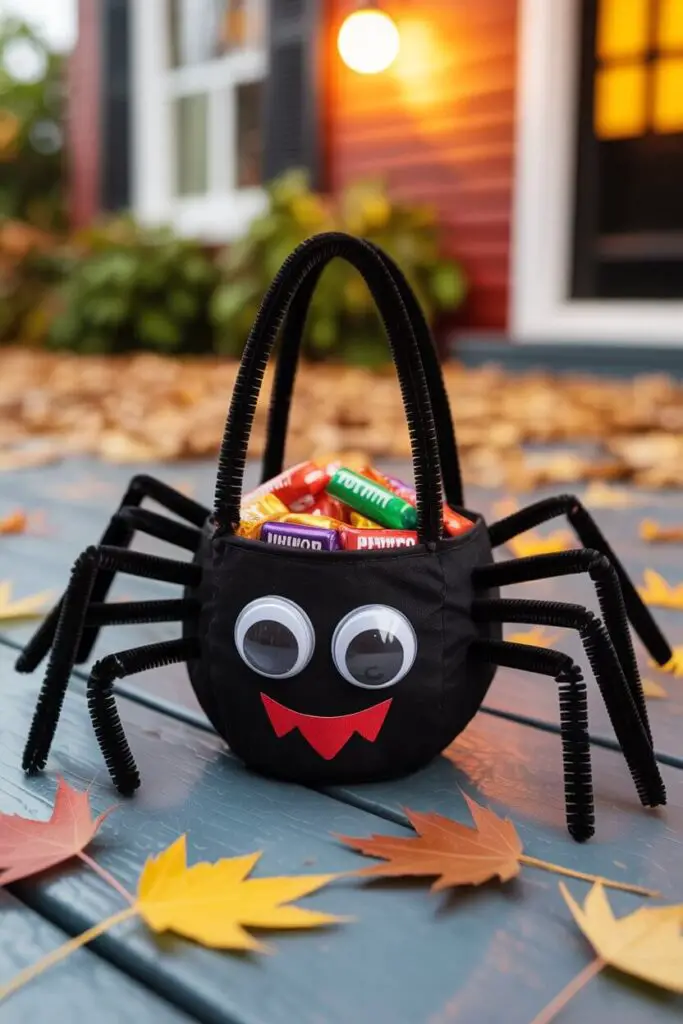
What’s scarier than a spider on Halloween? A treat bag shaped like a spider, of course!
Materials:
- Black fabric or paper bags
- Black pipe cleaners (for legs)
- Googly eyes
- Hot glue gun
Instructions:
- Attach four black pipe cleaners to each side of the bag to make the spider’s legs.
- Stick googly eyes on the front of the bag.
- Fill with Halloween candy and you’re done!
Why I love it: Spiders can be creepy, but these bags are so fun and easy to make. Plus, they’re a great way to add a little extra spookiness to your Halloween festivities!
Conclusion
There you have it—11 amazing DIY Halloween treat bag ideas that’ll make your Halloween treats the highlight of the night.
From spooky skeletons to adorable pumpkins, these bags are the perfect way to show off your crafty side without breaking the bank.
So, which one’s your favorite? Let me know which design you’re going to try!
And don’t forget—Halloween is all about having fun and getting creative, so go ahead and make those bags as spooky (or cute) as you want.